STUDEX® is the right place if you value 100 % quality and safety when it comes to ear piercings and earrings. As the world’s leading manufacturer of ear piercing systems and hypoallergenic earrings, we offer you genuine STUDEX brand products and services. We’re proud to be the de facto industry standard for ear piercing.
Our industry-leading STUDEX ear piercing systems are safe and hygienic. The piercing earrings, which actually serve to pierce the ear, come in sterile, individually sealed packaging. These precision instruments can be operated quickly with great ease. In one motion, the ear is pierced, the stud is set, while the earring back is also fixed in place. Meeting or exceeding EU standards and FDA regulations (U.S. Food & Drug Administration) is for us a matter of course.
The ear piercing system STUDEX® System75™…
…is barely noticeable, virtually silent and thus also ideal for children. It offers the optimum in hygiene: The studs and earring backs are contained within a single-use cartridge, which is inserted directly into the instrument. The cartridge never touches your skin or that of the ear piercing specialist, whether during insertion or removal of the cartridge. The industry-leading technology ensures an especially gentle setting of the ear piercing. For this reason it is also ideal for use on the flat cartilage area of the upper ear.
Other STUDEX ear piercings systems are our classic instruments STUDEX® PLUS and STUDEX® Universal. These instruments have proven themselves in over 40 years of service, and many million ear piercings have been performed with these worldwide.
Where to have your
ears pierced with STUDEX®?
We take utmost care in selecting our partners and value these greatly: jewelry stores, beauty salons, piercing studios, hair dressers, doctors, and pharmacies. All STUDEX partners are well trained and offer you excellent, personal advice. You’re in good hands.
STUDEX System75 is very gentle, tissue friendly, and barely noticeable.
The system is virtually silent and thus also ideally suited for children.
Go for original STUDEX® products
Ear piercing is a matter of trust, and it does make a difference which ear piercing system and piercing earrings you choose. Therefore, when having your or your child’s ears pierced, make sure to look for top quality and safety: Ask your ear piercing specialist if they use STUDEX System75. The following characteristic features will help you recognize genuine STUDEX brand products.
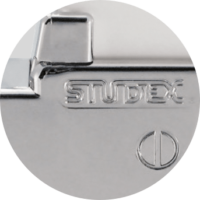
The instrument
The original STUDEX® System75™ instrument has an embossed STUDEX logo font. Together with the original STUDEX cartridges, this system ensures a safe and hassle-free piercing process.
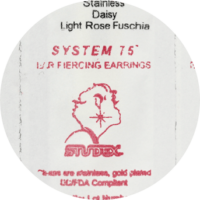
The cartridge seal
The seal of the blister pack of the original STUDEX® System75™ cartridge shows the STUDEX logo, the name ,“SYSTEM75™,” and a date by when the sterility of the earring and clasp is guaranteed. This is usually a period of 10 years. In addition to the touch-free loading of the instrument, the original cartridges ensure an optimal piercing process.
The earring back
Every original STUDEX® System75™ piercing stud also has the words “STUDEX CLASSIC USA” embossed on the clasp.
How ears are professionally pierced: 12 steps
Ear piercing with STUDEX® System75™ is easy, safe and absolutely hygienic. The following 12 steps describe what to expect when you have your ears professionally pierced at a STUDEX partner store with STUDEX System75.
Step 1
Both sides of the earlobe are cleansed with an alcohol prep pad. Allow 30 seconds for the alcohol to dry.
Step 2
A marking pen is used to mark the precise spot where the ear will be pierced.
Step 3
Look in the mirror to confirm that the proper spot has been marked. The marking will then be carefully wiped off, leaving just a hint of a dot.
Step 4
The seal of the blister pack is then peeled off without removing the cartridge containing the piercing earring and clasp, thus ensuring sterility.
Step 5
The cartridge is now loaded onto the instrument without touching it.
Step 6
Once the cartridge is properly attached, the blister pack is lifted off. Neither piercing earring nor clasp were touched at any stage.
Step 7
The point of the piercing earring is lined up precisely with the mark on the ear.
Step 8
The instrument’s handle is then squeezed and the ear is gently pierced with the piercing earring. The clasp is positioned at the same time, assuring the proper distance between earlobe and clasp.
Step 9
At this point, the instrument is released and removed with a gentle downward motion.
Step 10
The blister pack is then placed over the empty cartridge for easy removal.
Step 11
The cartridge is now removed and disposed of. This completes the entirely sterile piercing process.
Step 12
Finally your ear piercing specialist will give you advice on the proper after piercing care. Starting 24 hours after your ear was pierced, you should apply an aftercare product regularly, twice a day, to the front and back of the ear piercing.
Watch the ear piercing process in these videos
Stylish and safe — right from the start
About ear piercing and earrings
Care advice for newly pierced ears
Real gold, titanium, surgical stainless steel
All about the latest ear piercing and earring trends
Image credits
Header image: © Tyler Nix/Unsplash; “ear piercing for children” girl: © MNStudio/Adobe Stock; other images: © STUDEX of Europe GmbH or see the respective pages